How to Install Soundproof Insulation with Acoustic Panels
- Written by: Future Home Pro
- Updated: December 3, 2024
Table of Contents
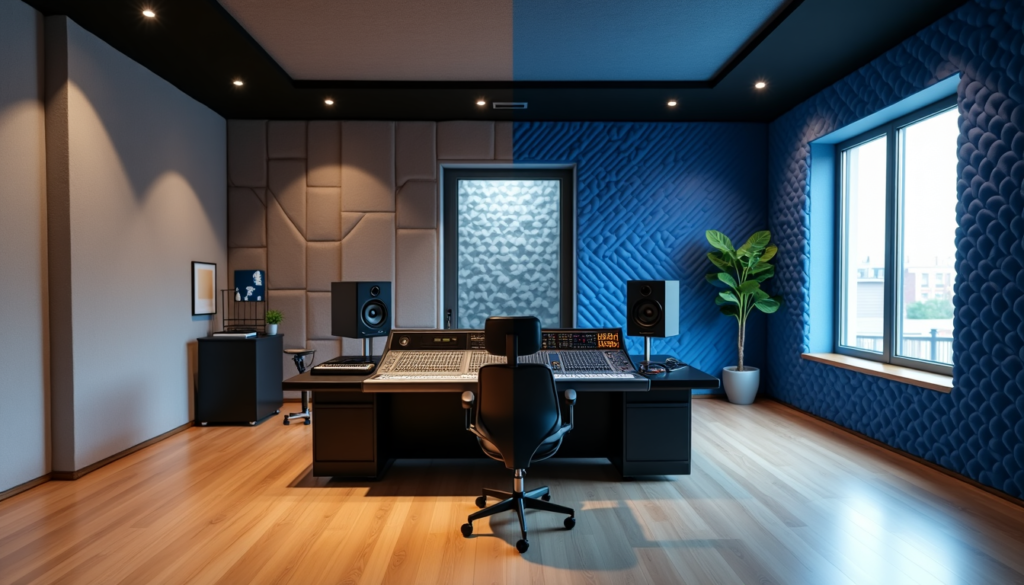
Noise from traffic, neighbors, and echo chambers can really affect our daily lives. The right combination of soundproof insulation and acoustic panels creates a strong barrier against these unwanted sounds and helps create a peaceful environment anywhere.
Let us guide you through a detailed installation process for soundproof insulation and acoustic panels. The instructions will help you select proper materials like mass loaded vinyl and learn installation techniques that encourage engagement to maximize sound absorption through density and positioning. You will also learn how to test your room’s acoustics and fine-tune them for the best results.
1. Choose the Right Acoustic Panels
At the time of choosing acoustic panels for soundproofing, you should know that each panel offers unique properties. The right selection will transform how sound behaves in your space.
Types of acoustic panels
Here are the main categories of acoustic panels you should know about:
Foam Panels: These versatile and lightweight panels control mid to high-frequency sounds effectively. They work especially well in home studios and offices and come with various thickness options that are easy to install.
Fabric-Wrapped Panels: These panels blend functionality with style through their outer fabric layer. The design enhances visual appeal while maintaining sound absorption properties. You’ll find them commonly in commercial spaces and conference rooms.
Bass Traps: These specialized panels control low-frequency sounds and work best when placed in corners where bass frequencies accumulate. They play a vital role in achieving balanced acoustics for recording studios and home theaters.
Diffuser Panels: Unlike absorption panels, diffusers create a more natural acoustic environment by scattering sound waves in multiple directions. These panels work best in spaces where you want to keep some sound liveliness while controlling reflections.
Factors to think over while selecting panels
We help our clients choose acoustic panels by focusing on these most important factors:
NRC Rating: The Noise Reduction Coefficient (NRC) measures a panel’s sound absorption on a scale of 0 to 1. Professional spaces need substantial echo reduction, so we recommend panels with an NRC rating of 0.9 or higher.
Material Selection:
- Perforated Wood: A perfect blend of sound dispersion and visual appeal
- Mineral Wool: Delivers excellent fire resistance and thermal insulation
- Acoustic Foam: Works best in smaller spaces with mid-frequency absorption
Thickness and Density: Thicker panels (2 inches or more) absorb low frequencies better, and denser panels control bass sounds effectively. The best results come from covering 25-30% of all hard surfaces.
Fire Rating: Public venues need Class A fire-rated materials such as fiberglass panels or melamine foam. Standard polyurethane foam falls short of these safety requirements.
These factors are the foundations of selecting acoustic panels that match your sound control needs and enhance your space’s visual appeal.
2. Prepare the Room for Installation
The right preparation of your space will help you get the best soundproofing results before you start the installation. Careful planning and precise measurements make the most important difference in the outcome.
Clear the space
The best approach focuses on one room at a time to minimize disruption. Remove all furniture and wall decorations from the areas where panel installation will occur. Safety First: The power must be turned off at the main panel before any work begins on electrical components.
The electrical work requires you to:
- Relocate electrical boxes that share the same stud cavity
- Ensure box edges extend 1-1/8 inch from the stud
- Use box extenders where needed
- Mark all stud locations on both floor and ceiling
Measure and mark panel locations
Here’s a proven way to place panels that will give you the best sound quality and visual appeal. The quickest way to get accurate spacing uses a simple formula: measure your wall’s length, subtract the total width of all panels, then divide by the number of gaps you need (panels plus one).
These are the significant factors to think about when marking panel spots:
- Space panels evenly, no more than twice their width apart
- Mount them where sound originates and reaches listeners
- Place panels about two feet from the ground in seated areas
- Make sure you treat all parallel walls
The mirror trick method works best for exact placement. Just sit in your listening spot while someone moves a mirror along the wall. The spots where you see speaker reflections in the mirror will be your ideal panel positions.
Pro Tip: A spirit level and straight edge will help you line up panels perfectly. Creating a detailed layout plan through computer software or careful measurements helps you avoid installation mistakes that can get pricey.
Panel height will substantially affect performance – sound waves take longer to reach panels mounted higher up. Larger spaces work best with 8 or 9-foot panels to give complete coverage.
3. Install Insulation in Wall Cavities
The right insulation in wall cavities is the foundation of soundproofing that works. The choice of materials and proper installation techniques substantially affect the end results.
Select appropriate insulation material
Let me share some proven insulation options that work great for soundproofing projects.
Fiberglass Batts: These batts are our first choice for most installations because they are budget-friendly and provide the quickest way to insulate. Our team uses batts [3 1/2 inches deep and 15 1/4 inches wide with an R-value of 15] for typical 2-by-4 construction.
Dense-Packed Cellulose: This eco-friendly option works exceptionally well for soundproofing. The recycled paper products create complete coverage and give you excellent air infiltration resistance.
Spray Foam: The superior insulation properties of spray foam make it worth the higher cost. We recommend this option for irregular spaces, and it delivers maximum sound reduction by filling cavities completely.
Proper insulation techniques
These safety items are needed at the time of installation:
- Protective gear (gloves, safety glasses, dust mask)
- Long-sleeve shirt and pants
- Respiratory protection
- Knee pads to stay comfortable during installation
Our installation process follows these key steps:
- Measure and Calculate: We measure wall cavities and include extra material to account for waste and irregularities.
- Prepare the Material: A straight 2-by-4 guides us to trim the batt’s width for narrow stud bays. We create shallow cuts with a utility knife that fit precisely.
- Install the Insulation: The insulation needs to fit snugly against the stud bay’s top with edges flush against studs. We don’t compress the material because that reduces its soundproofing quality.
- Handle Obstacles: We split the batt’s thickness for electrical components – one half goes behind wires and the other in front. The full thickness goes behind plumbing pipes to prevent freezing.
- Install Vapor Barrier: Cold climates need a vapor retarder on the insulation’s inside face. We secure 6-millimeter plastic or breathable sheets every 12-24 inches for unfaced batts.
Pro Tip: Injection foam or blown-in insulation through small holes works best for existing walls. This method keeps disruption low while staying effective.
Density and coverage are crucial to soundproofing results. It’s worth mentioning that spotty or uneven installation can substantially reduce the insulation’s sound-dampening properties. The installation technique matters just as much as your choice of material.
4. Mount Acoustic Panels on Walls
Acoustic panel installation needs careful attention to detail and the right mounting technique. We have perfected two proven methods that ensure panel stability and optimal sound absorption.
Adhesive mounting method
Adhesive mounting gives you a clean, permanent solution that works great with fabric-wrapped acoustic panels. Industrial-strength construction adhesive like Loctite Power Grab delivers the most reliable results.
You’ll need these materials to mount your panels:
- Industrial-strength construction adhesive
- Double-sided mounting tape to position temporarily
- Level and measuring tape
- Clean cloth to prep the surface
Here’s how to install your panels:
- Surface Preparation: Sand the mounting surface and wipe away debris to help the adhesive stick better.
- Panel Marking: Mark the panel’s exact position with a level.
- Adhesive Application: Apply adhesive two inches from the edge in a perimeter pattern and create an “X” pattern in the center.
- Panel Placement: Place the panel with care and press firmly across the surface.
- Curing Time: Let the adhesive cure for 24 hours.
Mechanical fastening method
Mechanical fastening works best if you need to reposition panels later. Two proven options are impaling clips and Z-clips, and each has its own benefits.
Impaling Clip Method This method has been our preferred choice for decades because it’s simple and works great. Here’s how to install it properly:
- Mark panel locations on the wall
- Position impaling clips 4 inches inside the panel edges
- Secure clips with appropriate wall fasteners
- Apply construction adhesive near each clip
- Press the panel firmly onto the clips until they fully penetrate the fiberglass
Z-Clip System Z-clips are your best bet if you want minimal wall damage. This system gives you great stability and makes panel removal easy. Here’s how to install it:
- Level marking of clip positions
- Secure Z-clips to both the wall and panel
- Carefully align and hang the panel
The Rotofast Snap On Anchor system works great for mechanical fastening, especially when you have a pullout strength exceeding 45 pounds in standard 6 lb./ft³ fiberglass insulation board. These anchors are perfect with rigid fiberglass core panels that range from 1 to 4 inches thick.
Pro Tip: You should always pair impaling clips with construction adhesive to get maximum stability. The clips hold the vertical weight while the adhesive cures and this will give a secure long-term hold.
Masonry surfaces like concrete or block walls need specific fasteners. Using the right mounting hardware for each type of wall surface will give you optimal panel security.
Note that proper installation will affect how well your panels absorb sound. Your soundproofing results will be best if you place and attach panels securely, whether you choose adhesive or mechanical mounting.
5. Install Ceiling Acoustic Panels
Ceiling acoustic panels are a significant element that provides detailed room soundproofing. The proper ceiling treatment enhances overall acoustic performance, particularly in spaces with high ceilings.
Suspended ceiling grid method
A suspended grid method gives you amazing flexibility and coverage. Our team has successfully used drop-in grid ceiling tiles that provide [NRC values of 0.75]. This system works great especially when you have:
- Home theaters and media rooms
- Recording and broadcast studios
- Entertainment facilities
- Restaurants and clubs
- Performance spaces
You’ll need these basic materials to install a suspended ceiling:
- Standard drop ceiling grid
- Acoustic ceiling tiles (2′ x 2′ or 2′ x 4′)
- Utility knife or boning knife
- Measuring tape
- Level
Here’s our proven installation process:
- Arrange the main runners parallel to each other
- Add cross tees perpendicular to runners
- Secure the grid system to the structural ceiling
- Cut tiles to size with a utility knife if needed
- Drop tiles into the grid and check their alignment
Pro Tip: We’ve discovered that [fiberglass tiles with matte white fabric facing provide excellent sound absorption properties]. These lightweight tiles work perfectly with standard drop ceiling grids.
Direct-mount ceiling method
A suspended grid might not work in every space, making the direct-mount method your best choice. This solution creates a clean, elegant finish and delivers excellent sound absorption with [an NRC rating of 0.95, which means it absorbs 95% of sound frequencies].
The direct-mount method works best with these two installation approaches:
Adhesive Installation [Titebond® Acoustic Ceiling Tile Adhesive] works great for most drywall ceiling applications. This method gives you:
- A clean, smooth look
- Rock-solid stability over time
- Easy installation steps
- Complete surface contact
Mechanical Fastening Building requirements or extra security needs might call for mechanical fasteners:
- Brad nailer with matching foot
- Snap-on anchors that mount securely
- A mix of adhesive and mechanical fasteners to maximize stability
Height variations play a key role in ceiling cloud installations to achieve the best acoustic results. [These panels are available in 1-inch or 2-inch thicknesses], and your space’s noise control needs determine the best choice.
Larger spaces benefit from [acoustic ceiling banners, which are catenary-mounted treatments]. These treatments excel at cutting down echoes and reverberations in big ceiling areas.
Installation Tip: The best results come from positioning panels right above the noisiest areas. [This matters most above conference tables and workstations], where clear speech depends on good sound control.
Panel placement substantially affects how well your acoustic solution works. [Ordinary ceiling tiles should span the entire ceiling] if you need complete coverage, while cloud panels and baffles work best in strategic spots for targeted sound control.
6. Fine-tune and Test the Room Acoustics
A proper acoustic test of your new soundproofing system is vital to achieve optimal performance. We’ve discovered that methodical measurements and adjustments can boost your acoustic panels and insulation’s effectiveness by a lot.
Conduct sound tests
The acoustic testing begins right after installation is complete. We use specialized equipment including SPL meters, frequency response analyzers, and RT60 meters to measure sound decay and get accurate results. Here’s everything in our testing process:
- Baseline Measurement
- Put the microphone at the room’s center
- Record ambient noise levels
- Document the original readings
- Sound Source Testing
- Turn on the sound source
- Measure frequency responses
- Record sound levels from different positions
- Adjacent Room Testing
- Set up measurement equipment in adjoining spaces
- Compare sound transmission
- Check how well the isolation works
Our best results come from testing multiple microphone positions – near the sound source, in the middle, and at the room’s far end. You should run each test twice to ensure professional-grade results.
The reverberation time (RT60) plays a crucial role because it shows how long sound takes to decay by 60 dB from its original level. This measurement helps us spot areas that might need more acoustic treatment.
Make adjustments as needed
Our test results guide us to optimize the acoustic environment. Our experience shows that even small changes can transform an acoustically ‘horrible’ space into an ‘acceptable’ one.
Common Adjustments Include:
- Repositioning acoustic panels to ensure even spacing, no more than twice their width apart
- Adding fabric treatments to walls for controlling high-frequency reflections
- Installing additional absorption in areas where reverberation exceeds desired limits
The fine-tuning of acoustics requires special attention to these critical factors:
Low Frequency Control
We’ve successfully reduced low-frequency reverberation using a combination of:
- Hybrid diffusers
- Strategic carpet placement
- Properly positioned upholstered furniture
High Frequency Management
For spaces with noticeable resonance between side walls, we recommend:
- Installing coarse fabric treatments
- Adding diffusive elements
- Adjusting panel positioning
In larger spaces like concert halls, we carefully think over how sound waves might achieve harmonic resonance with the room. This becomes crucial for:
- Music performance spaces
- Home theaters
- Recording studios
- Conference rooms
Professional acoustic testing services give you the best results. These specialists use precision equipment worth thousands of dollars and possess extensive knowledge of wall assemblies and room construction. A limited budget shouldn’t stop you because there are excellent free software options available that work with affordable reference microphones.
Fine-Tuning Tips:
- Start with basic measurements for orientation
- Experiment with temporary solutions like blankets or pillows
- Test different positions to find optimal placement
- Choose acoustic accessories based on tested results
Note that acoustic quality affects occupant performance, stress levels, and overall wellness by a lot. Careful testing and adjustment can create an environment that sounds better and improves productivity and comfort.
The fine-tuning of acoustics often involves subtle, subjective adjustments that may not be measurable through standard testing. We aim to achieve natural sound reproduction where:
- String instruments maintain their proper contours
- Piano notes retain their authentic color
- Vocal clarity remains pristine
- Overall sound balance feels natural
Conclusion
Professional soundproofing installation just needs close attention at every step. This includes picking the right materials and testing the acoustics at the end. Our complete approach uses proper insulation methods and places panels strategically to create sound barriers that work for each room’s needs. The right mounting methods, panel types, and installation spots will give maximum sound absorption while keeping the room looking great.
Sound-treated rooms offer many benefits. They cut down unwanted noise and create comfortable spaces where you can work, enjoy entertainment, or relax. After installation, professional testing and systematic tweaks revolutionize ordinary rooms into spaces with excellent sound quality. Simple upkeep and occasional adjustments help keep these acoustic improvements intact. This protects your investment and keeps sound control working perfectly over the last several years.
FAQs
1. How can I soundproof a room using acoustic panels?
To effectively soundproof a room, you can install acoustic panels which help absorb and reduce sound transmission. The installation process typically involves selecting the right type of panels, preparing the room, and securely mounting the panels on walls or ceilings.
2. What is the process for installing soundproofing panels?
To install soundproofing panels, start by sanding the surface where the panels will be mounted. Next, use a straight-edge level and a pencil to mark the placement area. Finally, screw the leveling brackets onto the mounting surface to ensure the panels are evenly installed.
3. Is it necessary to cover the entire wall with acoustic panels for effective soundproofing?
No, it is not necessary to cover the entire wall. Covering about 15-25% of the wall surface area with acoustic panels is typically sufficient to notice an improvement in sound reduction. The exact coverage may vary depending on the room’s characteristics and other factors like windows and ceiling surfaces.
4. How can I install acoustic foam without causing damage to the walls?
To install acoustic foam without damaging walls, consider using temporary adhesives like Command strips, double-sided tape, or specially designed foam mounting tabs that can easily be removed without leaving residues or damaging the paint.
5. What is the best interior soundproofing insulation for a home with shared walls?
For homes with shared walls, such as in wood frame constructions, using dense insulation materials like fiberglass or rock wool can be effective. These materials can be installed between wall cavities to significantly reduce sound transmission between adjacent spaces.
Related Articles

Getting Started with Smart Home Automation: A Beginner’s Guide
Smart home technology has revolutionized how we interact with our living spaces, offering convenience, energy efficiency, and enhanced security. Whether

Smart Home Security: Protecting Your Connected Home Without Compromising Privacy
Smart home security has become more than just installing a few cameras – it’s about creating a comprehensive system that

How Smart Home Technology Will Change Lives
The idea of “home” is evolving. Modern homes are becoming into “smart homes”—intelligent spaces that adjust to our requirements, improve
Smart Fire Detection Systems: Protecting Your Home with Modern Technology
Smart Fire Detection Systems now integrate multiple sensors, smart technologies, and air quality monitoring to provide comprehensive protection for your

Best Water Conservation Smart Devices for Your Home
Water Conservation Smart Devices can help you save money while protecting the environment. Our comprehensive guide reviews the most effective

10 Best Smart Noise Cancelling Devices for Peaceful Homes
Smart Noise Cancelling Devices can transform any space into a peaceful sanctuary. We’ve reviewed the best sound machines and ambient noise
Elevate your home, transform your life
Copyright © 2024 Future Home Pro | all rights reserved